
Writing iTerm2 Python scripts
iTerm2 is a very powerful piece of software and includes a plugin system that allows you to write Python scripts that terminal programs can take advantage of. In this post, we’re going to write two Python scripts for iTerm2: one to automatically switch to/from Dark Mode, and the second to play a sound on your local speakers when an escape sequence is printed, even over SSH. I’ll also share a few bonus snippets that take advantage of some of iTerm2’s lesser known features.
Getting Started
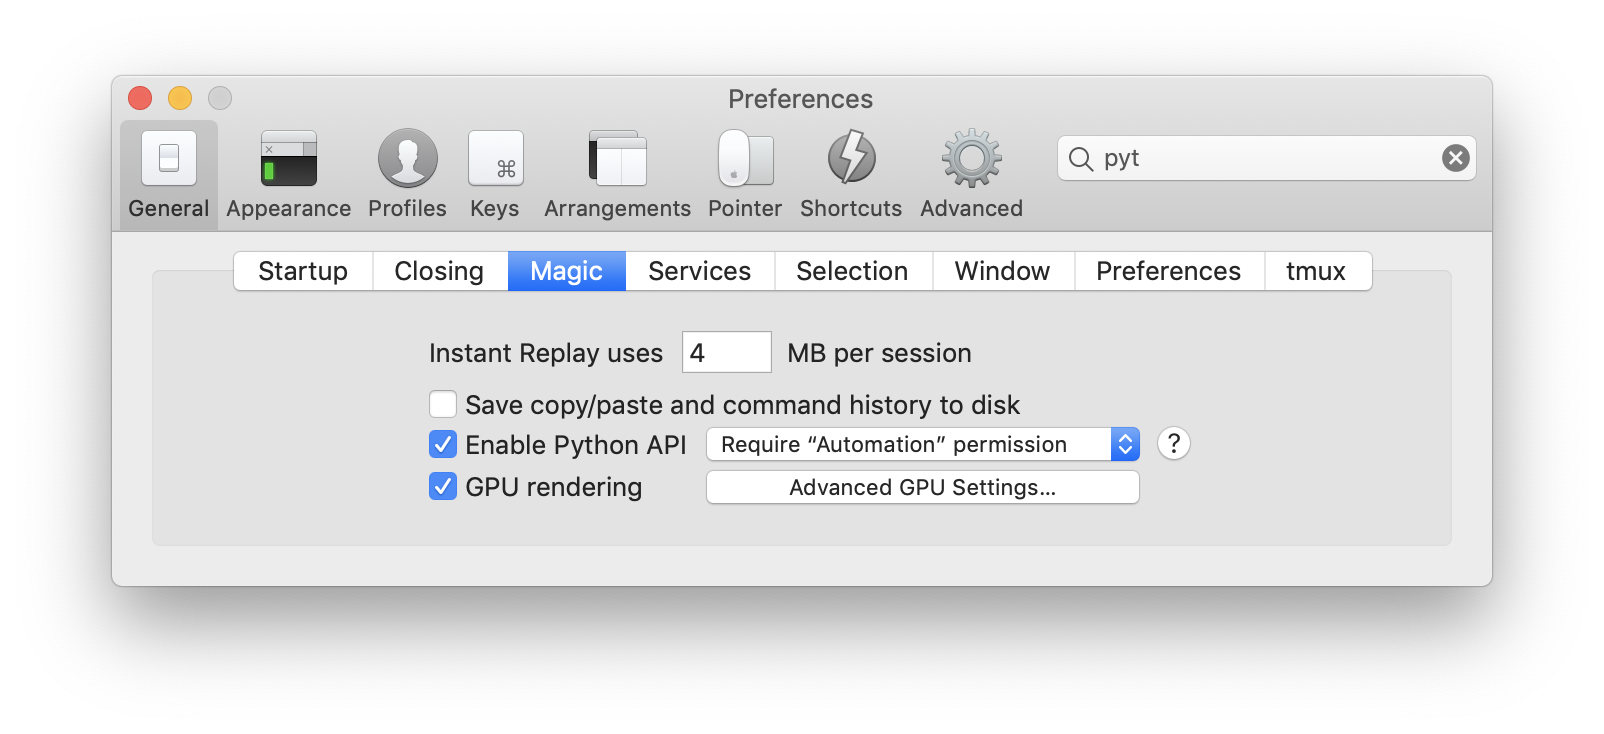
Section titled “Getting Started”Let’s build a simple “Hello, World” iTerm2 script to get started. First, enable the Python API in “Preferences ▸ General ▸ Magic ▸ Enable Python API”.
Once enabled, go to “Scripts ► Manage ► New Python Script”. If you’ve never done this before, iTerm2 will automatically ask to download the Python runtime. Once that’s downloaded, answer “Basic” and “Simple” to the two questions, then save the file to the default directory (~/Library/Application Support/iTerm2/Scripts). Take the template that iTerm2 created for you and add a print statement to it after the async_create_tab call.
#!/usr/bin/env python3
import iterm2# This script was created with the "basic" environment which does not support adding dependencies# with pip.
async def main(connection):    # Your code goes here. Here's a bit of example code that adds a tab to the current window:    app = await iterm2.async_get_app(connection)    window = app.current_terminal_window    if window is not None:        await window.async_create_tab()        print("Created a tab!")    else:        # You can view this message in the script console.        print("No current window")
iterm2.run_until_complete(main)
Now in iTerm, select your script from the Scripts menu. If everything is working, your active window should open up a new tab.
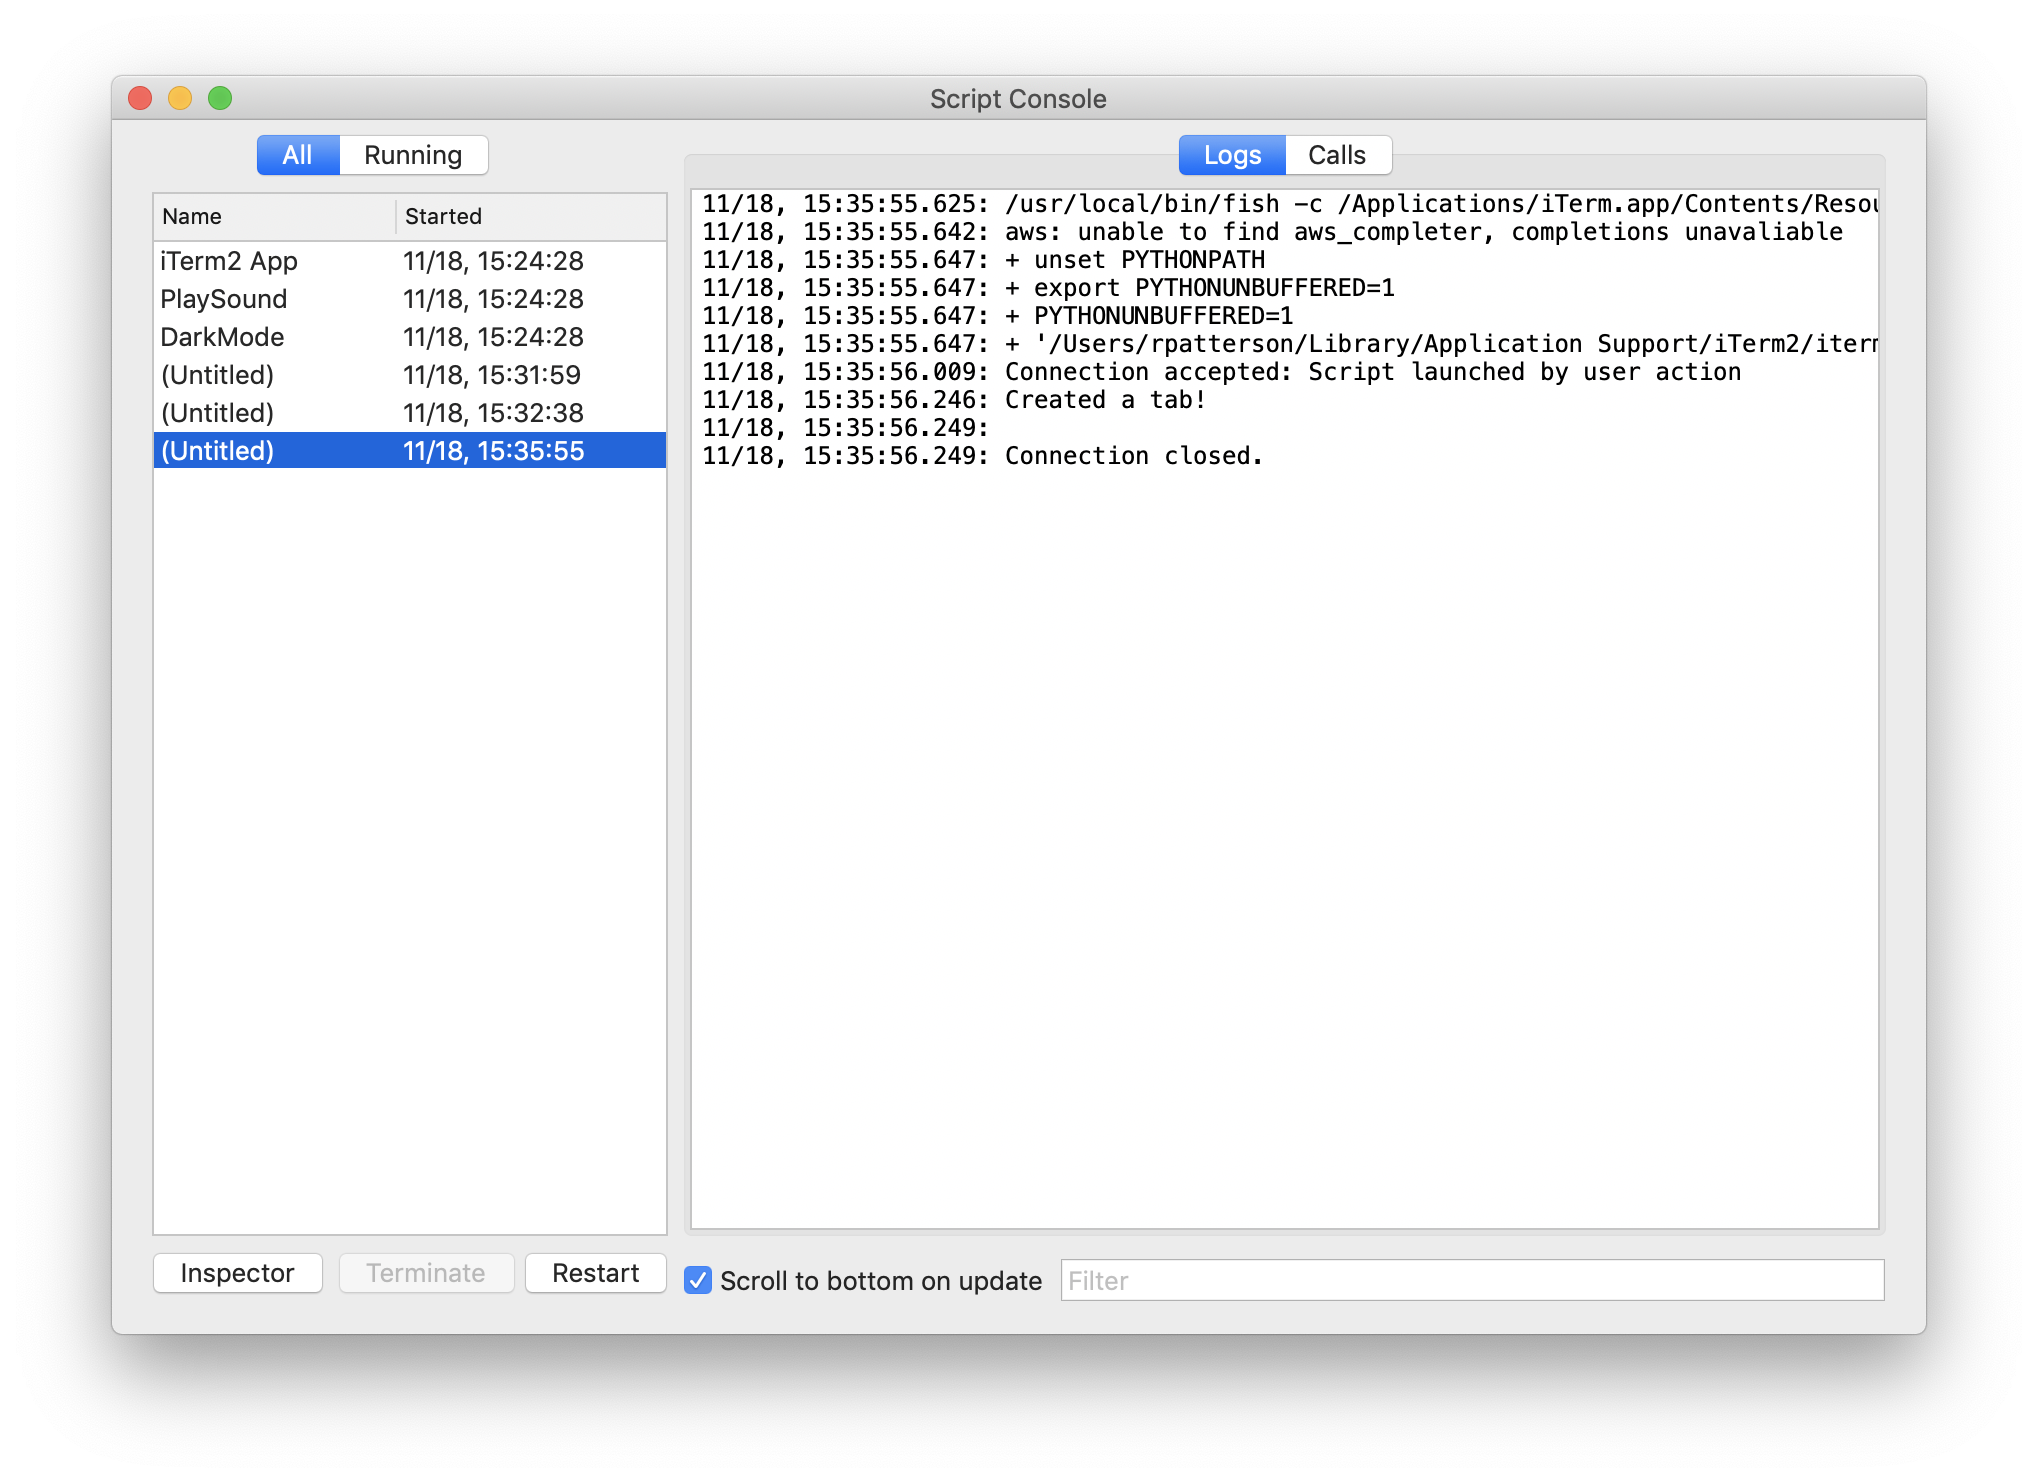
Debugging these scripts is possible with the iTerm2 console. To open it, use “Scripts ► Manage ► Console”. You’ll see all of your scripts, including those which have crashed or finished. Clicking on the latest one, we should see the output from the script, including the “Created a tab!” message that we added. We can also use the “Terminate” and “Restart” buttons to control the script. Note that you’ll need to manually restart the script any time you make a change to it.
Once everything is ready, we could move our script to the Scripts/AutoLaunch directory to have it be started automatically by iTerm2 when iTerm2 launches. That isn’t useful for the one-off script from this example, but you will probably want to do this for long-running scripts like the next two.
Automatic Dark Mode
Section titled “Automatic Dark Mode”
To have iTerm2 automatically switch between a light and a dark theme following your system setting, follow these steps:
-
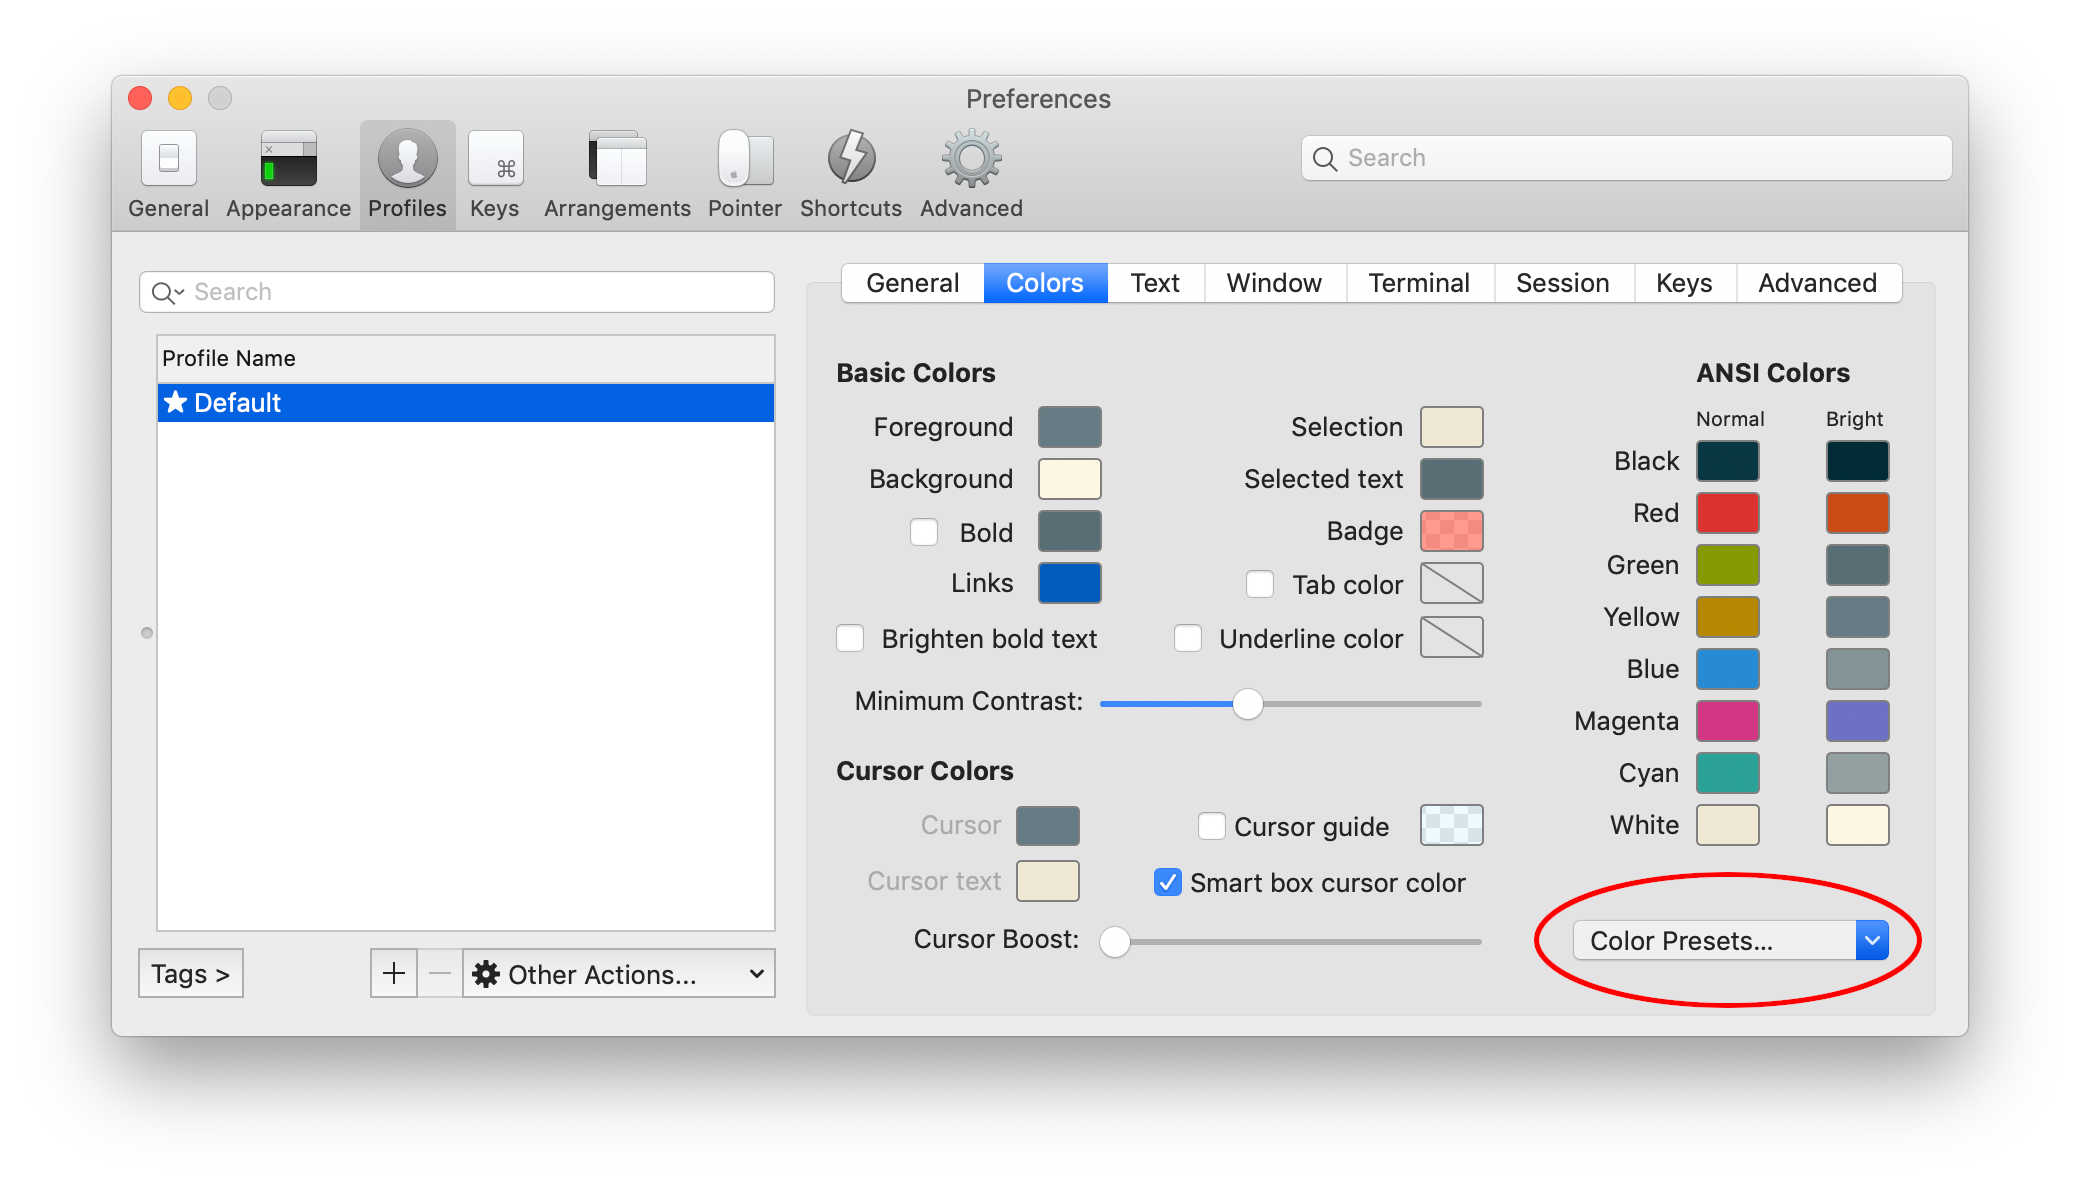
Go to Preferences ► Profiles ► Colors ► Color Presets… and set up your preferred light and dark presets.
-
Download DarkMode.py into your AutoLaunch directory.
-
Update the
async_handle_themefunction to use the correct Color Presets from step 1. -
Manually launch the script for the first time using “Scripts ► AutoLaunch ► DarkMode.py” (or restart iTerm).
I’ll walk you through the important parts of the code. Starting in the main function, you can see we set up a VariableMonitor on the effectiveTheme variable. This will allow us to detect when the system toggles Dark Mode. Note that the main function also checks the theme once on startup, so if Dark Mode was toggled while iTerm was not running, the change will be picked up immediately.
async def main(connection):    app = await iterm2.async_get_app(connection)    theme = await app.async_get_theme()    await async_handle_theme(connection, theme)
    async with iterm2.VariableMonitor(connection, iterm2.VariableScopes.APP, "effectiveTheme", None) as mon:        while True:            # Block until theme changes            joined_theme = await mon.async_get()            theme = joined_theme.split(" ")            await async_handle_theme(connection, theme)
iterm2.run_forever(main)
The async_handle_theme function simply looks at the theme, which will be something like “dark”, “light highContrast”, “dark minimal”, etc., and decides which color scheme to use before passing it to async_set_color_preset.
async def async_handle_theme(connection, theme):    if "dark" in theme:        preset = await iterm2.ColorPreset.async_get(connection, "Solarized Dark")    else:        preset = await iterm2.ColorPreset.async_get(connection, "Solarized Light")
    await async_set_color_preset(connection, preset)
The main workhorse is the async_set_color_preset function. The first part loops over all of the saved profiles in iTerm2, which are called PartialProfiles. You can see in my screenshot above that I have just one named “Default”. By setting the color scheme for each profile, when a new session is opened it will have the correct color scheme applied.
The second part loops over all tabs of all windows and sets their color scheme. This is causes all of the current session to switch to the correct color scheme when the system switches to/from Dark Mode. It does this by creating a LocalWriteOnlyProfile which will just contain the necessary changes to the colors, and then applying those changes with async_set_profile_properties.
async def async_set_color_preset(connection, preset):    """    This updates the color scheme of all profiles and of all active sessions.    """    # Update the list of all profiles and iterate over them.    profiles = await iterm2.PartialProfile.async_query(connection)    for partial in profiles:        # Fetch the full profile and then set the color preset in it.        profile = await partial.async_get_full_profile()        await profile.async_set_color_preset(preset)
    # Update all currently running sessions with the new preference.    app = await iterm2.async_get_app(connection)    for window in app.terminal_windows:        for tab in window.tabs:            for session in tab.sessions:                profile = await session.async_get_profile()                change = iterm2.LocalWriteOnlyProfile()                set_color_preset(change, preset)                await session.async_set_profile_properties(change)
Once you’ve set up the color schemes and installed this script, it’ll work silently. If anything isn’t working, check the iTerm2 script console first to find out why.
Playing sounds with iTerm
Section titled “Playing sounds with iTerm”This script allows you to write a short shell script to play an audio file on your local computer (or anything else, even to hit a physical bell), even over an SSH session. It works by using iTerm2’s custom escape sequences to run a Python function. To install this script:
- Download PlaySound.py into your AutoLaunch directory.
- Replace the
LIBRARIESconstant with a list of directories that contain audio files you’d like to play. - Manually launch the script for the first time using “Scripts ► AutoLaunch ► PlaySound.py” (or restart iTerm).
Our new custom escape sequence can be triggered using this bash snippet:
printf "\033]1337;Custom=id=%s:%s\a" "play-sound" "Glass"You can replace the “Glass” with the name of any sound file in one of the LIBRARIES directories. If you have a MacOS machine, the above snippet should make this sound:
The source code to this is really simple. Let’s first look at the main function: it uses a CustomControlSequenceMonitor to listen for our sequence, and then it calls our locate_sound function to resolve the value (e.g. Glass) to a filename (/System/Library/Sounds/Glass.aiff), and finally calls a program to play the sound.
async def main(connection):    async with iterm2.CustomControlSequenceMonitor(connection, COMMAND, r'^.*$') as mon:        while True:            match = await mon.async_get()            try:                filename = locate_sound(match.group(0))                subprocess.run(["afplay", filename])            except:                traceback.print_tb(sys.exc_info()[2])
iterm2.run_forever(main)
Our locate_sound function simply searches for files with a matching filename in one of the configured directories.
def locate_sound(name): for d in LIBRARIES: for m in glob.iglob("%s/%s.*" % (d, glob.escape(name))): return m for m in glob.iglob("%s/%s" % (d, glob.escape(name))): return m raise ValueError("no matching sound found")A quick note about security here. The iTerm docs recommend that the ID (COMMAND in this script) should be a password rather than a well-known string. This is because knowing the ID is the only access control that the file has. For example, if you run curl malicious.site/textfile and that file contains the escape sequence, it would trigger your script. For something silly like playing sounds, this isn’t a big concern, but it’s certainly worth keeping in mind when expanding on this idea.
Wrapping up
Section titled “Wrapping up”With these scripts you can make iTerm2 more useful for you. Next time, we’re going to look at some ways to get the most use out of these scripts.
