
Customizing iTerm2's New Tab
I do a lot of development on remote systems and in devcontainers. My environments are fixed, but there’s a lot of them (one environment for each of my professional clients, sometimes more).
One feature that I’ve come to love is iTerm’s ability to open a new tab with the same working directory as the current one. This works out-of-the-box for local directories, but I wanted to make it work for my remote systems as well. I spent a few hours last night hacking, and managed to implement my desired behavior by reusing some of my old scripts and combining them with iTerm2’s Python API.
Aside: Using tmux might be easier
I’ve been using iTerm2’s tmux integration to get this behavior on remote systems for a year before creating this plugin. It’s much easier to get working, just run tmux -CC in the remote environment and ensure that you’ve configured tmux correctly.
I think the tmux integration is great, but it does come with its own set of problems. Notably, I was unable to use some of iTerm2’s other integrated features over tmux, such as file transfer. Also, you can’t combine mosh with iTerm2’s tmux integration.
iTerm2 also has an SSH integration feature, which could be useful to you. I have never used the SSH integration, but it won’t work in containers (unless SSH is installed in them) and won’t work with mosh.
If you haven’t already tried the tmux integration, I recommend doing so before attempting to create your own plugin.
Here is our plan to create a “new tab” feature in iTerm2 that opens a new tab to the same remote shell (system and directory) as the current one:
- First, we’ll write a script that accepts the name of an environment and a directory, and opens a shell in that environment, in that directory.
- Then we need to teach iTerm which environment (and which directory) the shell is in, even when that is remote.
- Finally, we write a plugin that overrides ⌘ T to open the correct (possibly remote) environment.
Defining the environments
Section titled “Defining the environments”I have a shell script that I’ve been using for the past year that unifies how I access all of my configured environments. I call it @env, and it boils down to requiring that you define 4 functions: start, stop, report status, and run command. I use it to start up ephemeral Hetzner servers and run devcontainers on them.
I will write about @env one day, but for what we are doing today, we don’t need that much complexity. I’ve written the following as an example. All you need is a script that you can pass the environment name and the directory.
#!/bin/bash# Usage: ~/.local/bin/my-envs.sh container1 /workspaces/projectset -eudeclare -A container_paths=(    ["container1"]="/path/to/container1/project"    ["container2"]="/path/to/container2/project")container_path="${container_paths[$1]}"command=$(printf 'cd %q && exec fish' "$2")
# Start the devcontainernpx @devcontainers/cli up --workspace-folder="$container_path"# Run a shell in the devcontainernpx @devcontainers/cli exec \    --workspace-folder="$container_path" -- \    sh -c "$command"
The basic idea is to run a script that consists of cd $directory && exec $shell. When using ssh, remember to pass -t to ensure that you get a TTY interface.
My @env script is substantially more advanced than this, but this is the bare minimum that we need to implement our new tab feature.
Track the current environment in iTerm
Section titled “Track the current environment in iTerm”When we are in a shell in a remote environment, we could open a new shell in the same environment if we knew the name of the environment and the local directory we are in. Using the example script above, you could run my-envs.sh container1 /workspaces/project/packages/packageA to do it. In order for iTerm to do this automatically, we need it to know those two pieces of information.
iTerm2’s shell integration gives us the hooks we need to implement this. Out of the box, it already tracks the directory for us, and we can use a user-defined variable to expose the environment name. Here’s my iterm2_print_user_vars function:
function iterm2_print_user_vars --description "Called automatically by iTerm shell integration" iterm2_set_user_var atEnv $ATENV_NAMEendThen, in each environment, I run set -Ux ATENV_NAME environment_name, and that’s all (fish universal variables are saved per-user, permanently).
You can test that this is working by showing it in your badge. This next script can be run in any session to set its badge text. Run it, then change environments and cd around and watch the badge update, live.
printf "\033]1337;SetBadgeFormat=%s\a" "$(printf "@env: \\(user.atEnv)\n\\(path)" | base64)"In summary, with shell integration and a bit of extra config, we have two “scripting variables” we can use:
user.atEnvis the name of the environmentpathis the local working directory.
Writing the plugin
Section titled “Writing the plugin”Now that we’ve got the pieces in place, we just need to write a plugin that will open a new tab and then run our script with the appropriate values.
Let’s create our scaffolding plugin first. If you have never done this before, follow the Getting Started section of my previous post. This plugin will begin by registering an RPC handler.
#!/usr/bin/env python3import iterm2
async def main(connection: iterm2.connection.Connection):    app = await iterm2.async_get_app(connection)
    @iterm2.RPC    async def new_tab_here(session_id=iterm2.Reference("id?")):        alert = iterm2.Alert("New Tab Here", f"called from {session_id!r}")        await alert.async_run(connection)
    await new_tab_here.async_register(connection)
iterm2.run_forever(main)
To configure this, we’ll add a keybinding for ⌘ T in Settings › Keys › Key Bindings. Set the Action to “Invoke Script Function…” and the script to new_tab_here().
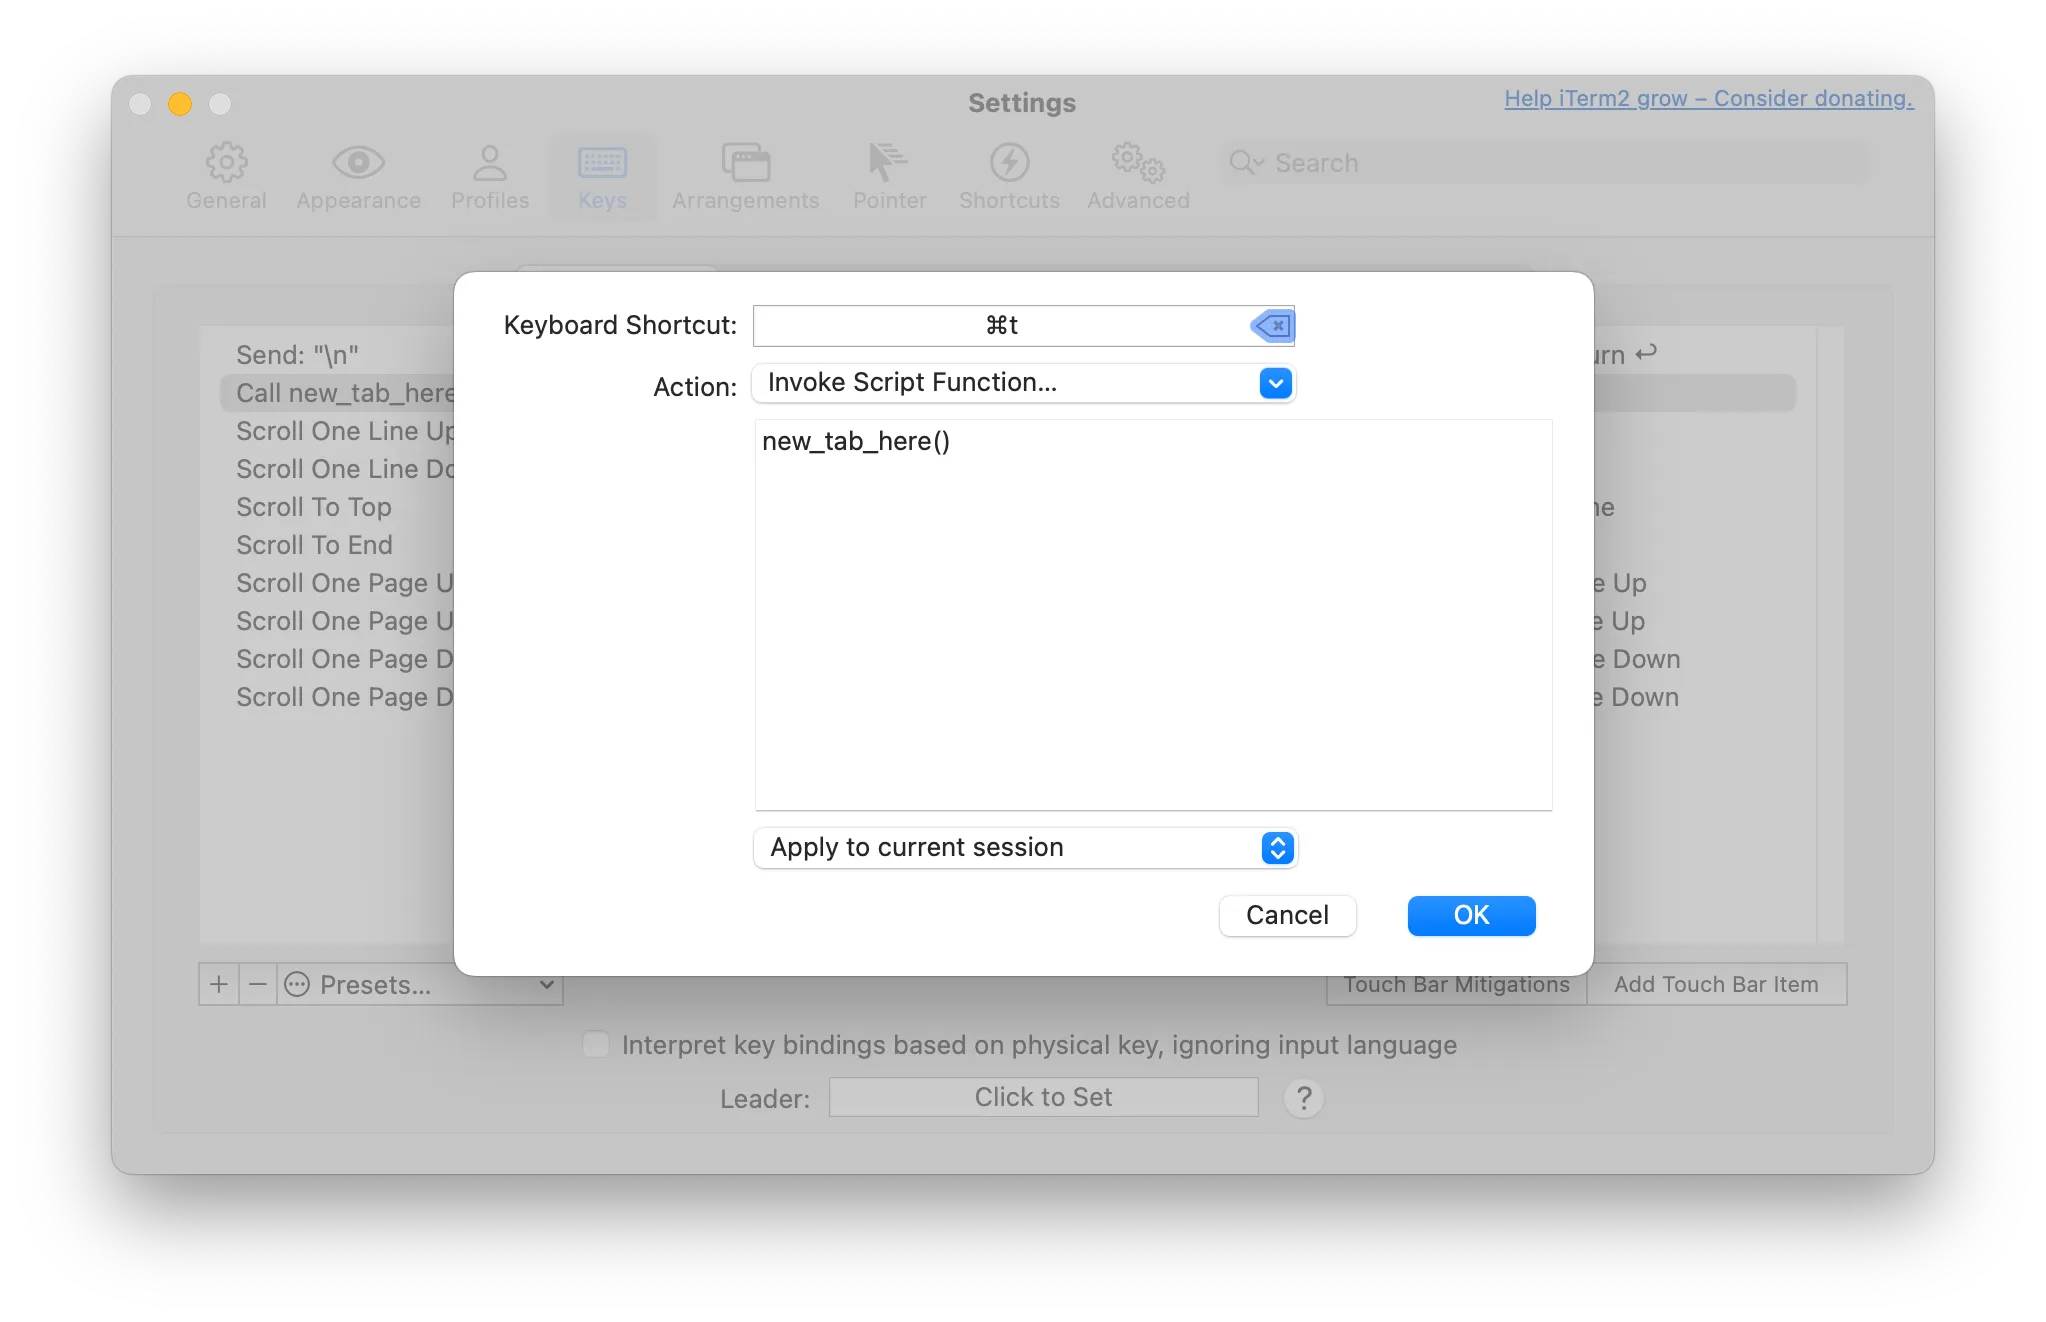
Close the dialog and test by pressing ⌘ T both in a window and with all windows closed. You should see an alert showing the session ID of the active session (or None). Unfortunately, this won’t capture using the mouse to select Shell › New Tab, but this is the best I could figure out.
Next, let’s gather the pieces we need. We’ll identify the session and read the variables out of it.
if not session_id:    # No active session -> create a new window    await iterm2.Window.async_create(connection)    return
session = app.get_session_by_id(session_id)if not session:    returnwindow = session.windowassert window is not None
# What tab should we create?atenv = await session.async_get_variable("user.atEnv")if not atenv:    # Not a remote environment, so we use iTerm's default behavior    await window.async_create_tab()    returndirectory = await session.async_get_variable("path")
# Show the piecesalert = iterm2.Alert("New Tab Here", f"Open a new tab with {atenv=!r} {directory=!r}")await alert.async_run(connection)
Now when you press ⌘ T it should show you exactly where you want the new tab to be.
The final step is to open a tab using that information. We do this by overriding the new tab’s command to point to our script with the appropriate parameters. Replace the alert with the following.
# Open the tabimport shlexinner_command = shlex.join(    ["/Users/myuser/.local/bin/my-envs.sh", atenv, directory])command = shlex.join(["/opt/local/bin/fish", "-c", inner_command])
profile = iterm2.profile.LocalWriteOnlyProfile()profile.set_use_custom_command("Yes")profile.set_command(command)profile.set_initial_directory_mode(    iterm2.profile.InitialWorkingDirectory.INITIAL_WORKING_DIRECTORY_HOME)await window.async_create_tab(profile_customizations=profile)
Some things to note:
- Replace the
inner_commandwith the actual script that you wrote. - Replace
/opt/local/bin/fishwith the actual path to fish (fromwhich fish). - Fish is not a requirement here, you could use
inner_commandas the command directly, but I run through fish because otherwise many environment variables I depend on won’t be set up. You can also adjust this to your own shell.
And that’s it! Restart the plugin one more time, enter one of your environments, and press ⌘ T to open another tab that is in the same directory in the same remote environment. Magnificent.
